Answer Notification
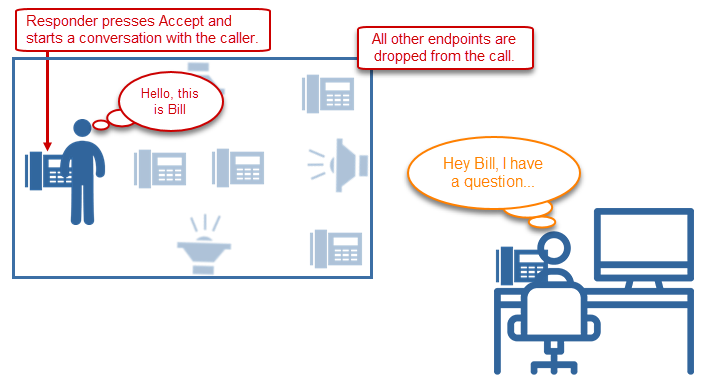
Use this type of notification to send a notification to multiple phones, asking someone to answer. The notification displays an Accept button on the phone. As soon as someone presses Accept, all other endpoints are dropped, and the notification becomes a two-way conversation between the caller and responder.
You can include speakers as endpoints so that your notification can be heard by people who may not be near a phone. However, a responder cannot accept the call from a speaker, even if it is a talk-back speaker.
Note: If your application is not configured to use line numbers to trigger notifications, you cannot use this notification type.
For this example:
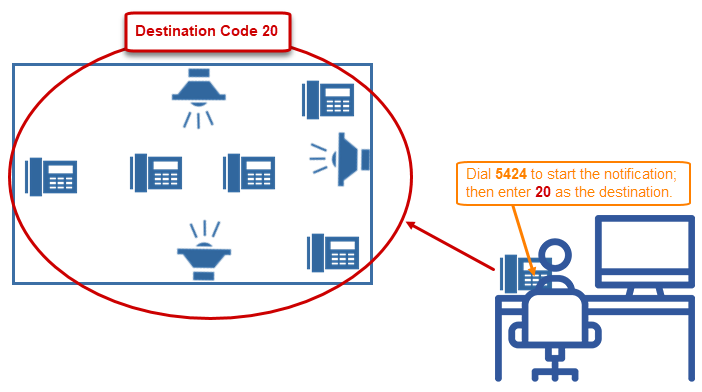
- My warehouse has five phones and three speakers.
- I created a destination code of 20 that includes these eight devices. See Create destination codes to group endpoints together
- I created an Answer notification and enabled Allow users to add endpoints dynamically. See Here's how to set it up
- I assigned SIP line number 5424 as the notification trigger.
How this example works:
- Jane dials 5424 to start the Answer notification.
-
When prompted, she then enters 20 as the destination.
-
Bill, in the warehouse, hears the announcement on the speakers, goes to his desk, and presses the Accept button.
At this point, the speakers and other warehouse phones are dropped from the notification.
-
The notification automatically opens the speaker on Bill's phone. Bill can simply start talking to Jane, or he can pick up the handset (which turns off the speaker) and talk to Jane.
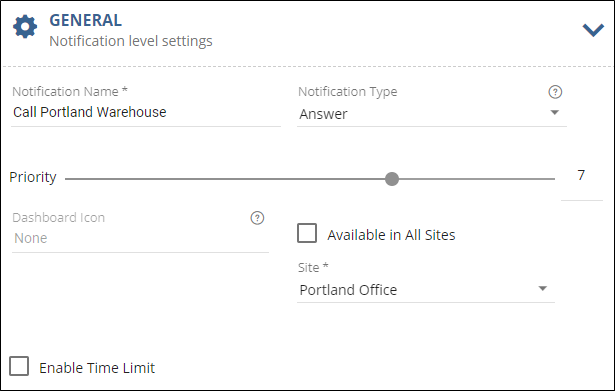
Go to Notifications > Manage and select New Notification.
Review the Notification Basics topic for information on the other notification types, and to learn more about using variables in the Message Details section.
Note: Complete these sections as needed, where the fields discussed are specific to this notification type.
- For Notification Types, select Answer.
- For Dashboard Icon, leave the value set to None. Live broadcast notifications are not available for assignment to the Dashboard.
-
For Activator, select SIP.
Note: Answer notifications can only be triggered by dialing a line number, therefore a SIP activator is the only option available.
-
For Trigger, select a line number.
Note: You cannot assign the same line number to more than one live broadcast/paging (one-way), recorded, or answer notification.
-
For Trigger Behavior, select Activate.
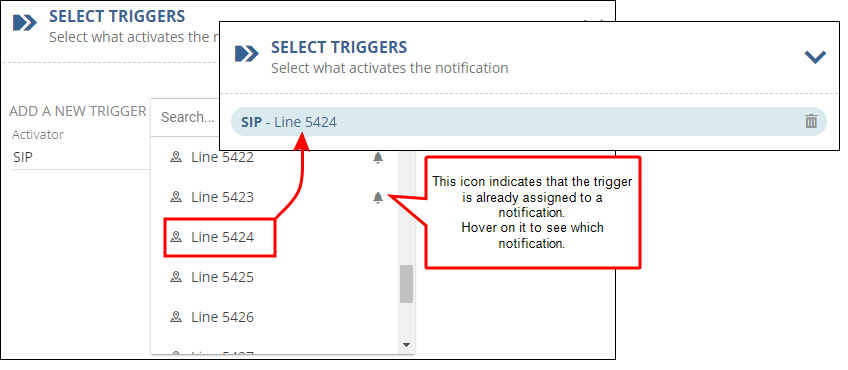
Answer notifications are initiated by dialing the assigned line number from any phone in the network.
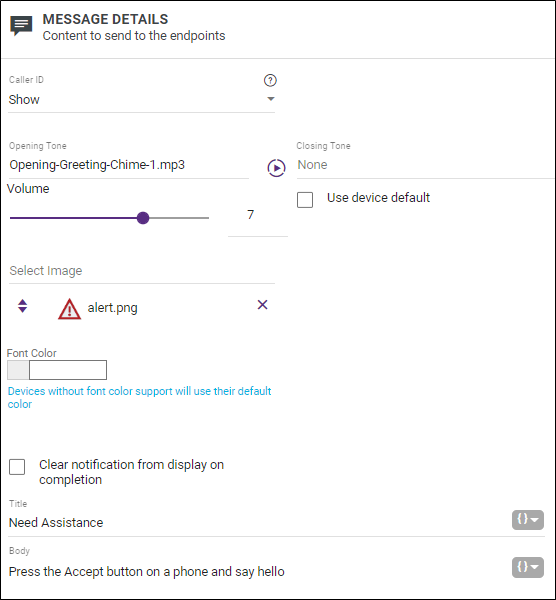
- (Suggested) For Opening Tone, it is suggested that you select an audio tone, which will helps get the attention of potential responders.
-
(Optional) For Closing Tone, it is suggested that you leave this as None, the default value. You could assign a closing tone, but it is not necessary in this scenario.
-
(Optional) For Select Image, select an image for displaying along with the notification
I'm using the alert icon for this example.
- For Clear notification from display on completion, leave it disabled.
-
For Title, enter a text string that helps people know what the notification is for.
For this example, I'm using Need Assistance.
-
For Body, enter some instructions for the receiver.
For this example, I'm using "Press the Accept button on a phone and say hello."
You can use this section to create notification actions as part of the notification. See Add Endpoint Responses and Notification Action Types.
This example does not use any notification actions.
Note: If an endpoint is a device that does not support two-way audio, it will receive the initial notification, but will not be able to answer, and it will be dropped off when the notification is answered.
-
For Allow users to add endpoints dynamically, select Allow.
If you leave this setting at None, you will then assign endpoints or tags within this tab.
For this scenario, I want to be able to enter extensions or destination codes on the fly. See Understanding Triggers for more information on dynamic endpoints.
-
For Number accepted, enter 2.
For this example, I'm going to use destination codes that I have set up.
- Do not change any fields in Choose Contact Methods or Additional Settings, as they do not apply to this notification type.
- Select Save.
Note: The lowest number accepted is 2. If you were allowed to set this to 1, and you wanted to enter individual endpoints instead of a destination code assigned to multiple endpoints, then you could only enter one extension number. You need to enter at least two extension numbers for the purposes of this notification type.
Revolution records this notification and saves it for a designated length of time defined by your system administrator in Global Settings > Notification Status > Notification Status Media Expiration.
To listen to the recording:
- Go to Notifications > Sent.
- Select the notification to open it.
- Select View Notification to play the recordings. See Sent Notifications.
