Push-to-Talk Notification
This type of notification is used when you want to use two IP and wireless phones as a walkie talkie.
- This feature is currently only supported on Cisco XML-enabled IP and wireless phones that also support soft-key buttons.
- Your network must be using multicast.
- This notification can only be initiated using a phone service trigger. Have you set that up yet? See the Phone Services topic for instructions.
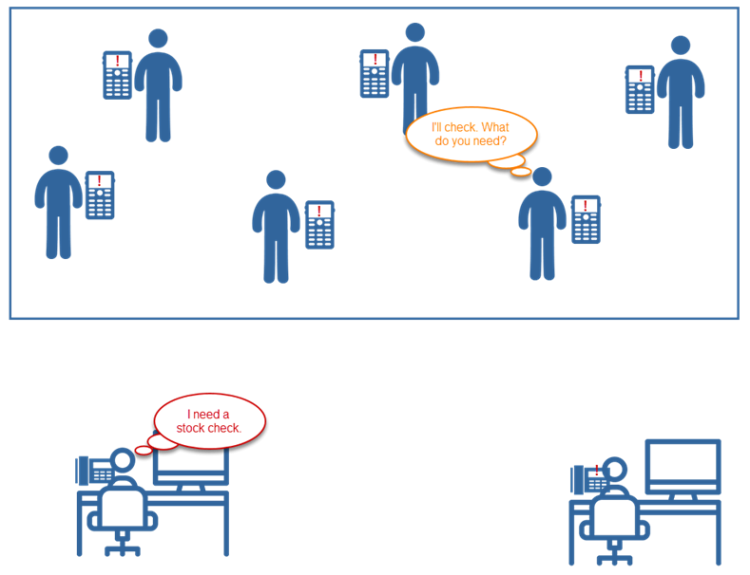
For this example, workers in my warehouse use Cisco wireless phones. They can use them like a walkie-talkie to talk to other warehouse workers and to office staff.
Go to Notifications > Manage and select New Notification.
- For Notification Name, provide a descriptive name that's meaningful to your users.
- For Notification Type, select Push-to-Talk.
- For Priority, select a level for the notification. Not all endpoints support priority levels. Check the endpoint vendor documentation.
-
(optional) For Dashboard Icon, select an image that is used on the Revolution dashboard.
For this example, you will not select an icon.
-
For multi-site organizations, do one of the following:
- If you're an All Sites Admin or All Sites Editor – To assign this notification to a specific site, disable Available in All Sites and select a Site from the drop-down list. Alternatively, you can leave it Available to All Sites.
- If you're a Site Admin or Site Editor – This notification is automatically assigned to your default site. Each Site Admin will need to create their own triggers.
- (Optional) Select Enable Time Limit and then enter a Time Limit value, in seconds, to restrict the time of the call
- For Activator, select Cisco. Push-to-Talk can only be activated using a phone service trigger.
- For Trigger, select a phone service. You can select New Trigger to create a phone service at this point.
-
Select the Trigger Behavior. In most cases it should be Activate.
- For Caller ID, select a behavior. For this example, leave it set to Show.
- (Optional) For Opening Tone, select an audio file to get the attention of the person you're trying to reach.
- (Optional) For Closing Tone, select an audio file to indicate when the call is complete. You don't really need this for this notification type.
- For Volume, select a value for the notification. This volume overrides the volume set on the endpoint receiving the notification, such as a phone or speaker. Alternately, you can select Use device default instead of setting the volume in the notification, which means that the audio plays at 80% of the volume set for the speaker. See Endpoints > Volume for more information on where you can set the default volume for speakers.
- (Optional) For Select Image and Font Color, do not alter these settings as they aren't necessary for this type of notification.
- For Clear Notification from display on completion, leave it disabled. Enabling 'Clear notification...' removes the message content from a phone endpoint display once the selected audio files finish playing. For this example, no text is included, thus there's nothing to clear.
-
For Title and Body, leave them blank.
For this example, since this is a live conversation between two endpoints, I'm not including text.
You can use this section to create notification actions as part of the notification. See Add Endpoint Responses and Notification Action Types.
This example does not use any notification actions.
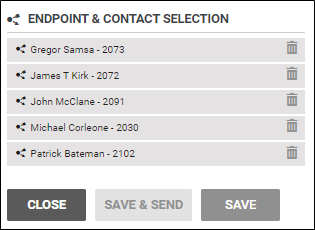
- Select all the endpoints that can potentially participate in a walkie-talkie conversation. For this example, I have several warehouse workers, so, I'll add their endpoints. And I have two office managers they may need to contact, so I'll add their endpoints.
- Leave Contact Methods unchecked. Push-to-Talk notifications cannot be forwarded to contacts.
- Do not select Mobile App Geofence Boundaries or a General Purpose Output Relay Mode. They don't apply to this notification type.
-
Click Save.

Press the Push-to-Talk button on the phone generated by the phone service trigger you created.
Press and hold the Talk button to begin speaking; release it when you're done.
One of the respondents presses and holds the Talk button on their phone to respond and then releases it when finished.
Alternately, you can press the Shout button (you don't have to hold it down) and begin speaking. Press the Unshout button when you're done.

To view details about the status of this notification, go to Notifications > Sent. Click on the notification to open it. See the Sending Notifications topic for details on navigating this page.
Review the Notification Basics topic for information on the other notification types, and to learn more about using variables in the Message Details section.
