Sending Desktop Notifications
Note: Only All Sites Admins have full access to configuration.
The Desktop module allows you to push notifications to your contact's desktops within your network. It is used in conjunction with the Desktop Notification Client (DNC), which is installed on each end-users' desktop that you want to receive notifications.
The basic steps are:
- You must install the DNC on the desktop or laptop of each end-user that you want to receive notifications.
- You can install DNC on Windows 10 or newer or on macOS 10.12 and newer.
- The DNC installer is a 32-bit executable that runs in both 32- and 64-bit environments.
- You must be logged in as a local admin on the desktop or laptop to install the DNC.
- DNC installation is not supported on Terminal Services Virtual Desktops.
- Users with user-level rights on the local Windows system can launch the DNC and connect it to Revolution.
Note: Alternately, you can install the DNC on end-user's desktops using an automation tool. See Desktop Notification Client Automated Installation.
Perform this procedure for each desktop or laptop.
-
From the Revolution submenu (three dots in the upper-right corner), select Download Desktop Client.
Revolution detects your platform and downloads the appropriate Desktop Client executable.
- Double-click the downloaded executable to begin installation.
- Follow through the install window instructions.
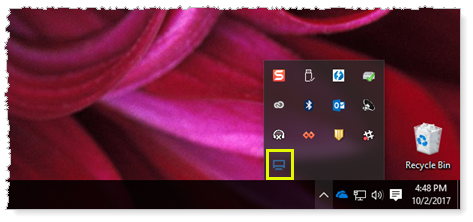
The DNC service starts automatically after installation. The service also starts automatically when users reboot or restart their Windows PC. The application opens minimized in the Windows notification area (formerly called the system tray).

Perform this procedure for each macOS machine.
-
From the Revolution submenu (three dots in the upper-right corner), select Download Desktop Client.
Revolution detects your platform and downloads the appropriate Desktop Client executable.
- Open the dmg package.
- Double-click the pkg and follow through the install window instructions.
The DNC service starts automatically after installation. The service also starts automatically when users reboot or restart their Windows PC. The application opens minimized in the system tray.
The DNC can register with multiple Revolution servers through DHCP option 72. The DNC will use the heartbeat interval settings specified in the Desktop module settings of each Revolution server. You can also manually enter Revolution IP server addresses in each DNC.
-
From Revolution, go to Configuration > Other Devices > Desktop Client.
-
(Optional) Change the default listening port (3001) if necessary.
-
(Optional) Change the default Heartbeat Interval (120) if necessary.
-
Select Save.
DNCs registered to this Revolution server listen for commands on the port defined in the Desktop module settings and use the heartbeat interval defined in the Desktop module. See Configuring DNC Settings on Windows for information on configurations within the DNC.
You can view each installed instance of the DNC on the Endpoints page.
- Go to Configuration > Endpoint
- In the Filter Table, search for DNC to display any DNC-related endpoints registered with the Desktop module.
When you want to add a DNC endpoint to a Notification:
-
Go to Notifications > Manage and edit an existing or create a new notification.
- For the notification, go to Endpoint & Contact Selection and either:
Select the Endpoints tab and search for DNC to find the DNC endpoints
Select the System Tags tab and go to Category > Computer to see the DNC endpoints
When a notification is triggered that has DNCs as endpoints, the DNC on end-users' desktops automatically open to display the notification. See the Desktop Notification Client topic.
-
Uninstall the DNC from the desktop or laptop using normal uninstall procedures for the OS.
Note: Uninstalling the DNC requires a reboot.
- On the next system heartbeat, Revolution shows the uninstalled DNC as inactive on the Endpoints page, at which point you can delete the endpoint. Once deleted, the endpoint is automatically removed from all notifications it is assigned to.
