Calendars Window
Create and manage calendars for use with the scheduler functionality.
Tasks associated with this window include:
- Creating a calendar
- Pausing events for a date range
- Pausing all events in a calendar
- Managing your calendars
Accessing this window:
- Go to Scheduler > Calendars.
Use calendars to group your events by category and/or by site.
- Select New Calendar.
- Enter a descriptive Name.
-
Define sites, using either of these two methods:
- Select Available in All Sites if you want all of your sites to have access to the calendar.
- Clear Available in All Sites and select a Site to make the calendar available to only a single site. This option applies only to multi-site organizations.
If you are a single-site user, you will only be able to create calendars for your site.
-
(Redundancy Only) For Priority Group, select one of your Priority Groups to define how you want your notifications to be distributed in your redundancy setup as well as your failover server order. All newly created calendars use the DEFAULT priority group, unless you copied a calendar, in which case the new calendar will inherit the priority group of the one copied.
All events associated with a calendar have the same priority group, however this is not visible to you.
- Select a Color to be associated with the calendar.
- Select the Local Timezone for the event.
- (Optional) Select Pause calendar to create the calendar in a paused state. See Pausing all events in a calendar
- (Optional) Define a Pause Range. See Pausing events for a date range
- Click Save.
Import events from ICS files you have exported from other calendar services. You can import the ICS file (or up to 10 files at once) into an existing calendar or create a calendar during the import process.
Revolution imports all types of events that you could create through the Scheduler interface, including single and recurring events (daily, weekly, monthly, and yearly). Details of the imported events follow these rules:
- Events retain their specified timezones.
- If an event does not have a timezone, it will inherit the timezone of the calendar. If the calendar does not have a timezone, the event will inherit the local timezone.
- Some calendar services convert timezones to UTC upon export.
- Events will inherit the site and priority group of the calendar.
The import procedure is:
- Select Import (
 ).
). - For Add to existing calendar, select the calendar to add the events to, or select the plus icon to create a new calendar for the events.
- Select Choose File to load up to 10 ICS files for import
- Select Import.
Define date ranges where all events in a calendar will be paused. For example, use this process if you want to ensure your events are not triggered during school vacation weeks or your factory is closed down for a period of time.
- Go to Scheduler > Calendars
- Select the Calendar you wish to edit. You can also perform this action when creating a new calendar.
-
Under Pause Ranges, select Add Pause Range.
- (Optional) Enter a Description, for your reference.
- Select All Day if you want to define your range for days only, not specific to a start time.
- Enter a Pause Date (events become paused) and Resume Date (events resume) to define your range.
-
(Optional) Define a Pause Time and Resume Time if you did not select All Day.
All times are relative to the calendar Timezone.
- (Optional) Select Add Pause Range again to define additional ranges.
- Select Save.
Pause all events in a calendar, using either of the following methods:
- From the Calendars window:
- Go to Scheduler > Calendars.
- Select the box in the Paused column for the calendar.
- From the Edit Calendar window:
- Go to Scheduler > Calendars.
- Edit the calendar you want to pause.
- Select Pause calendar.
After pausing the events, you will see the following changes to indicate a paused event or calendar.
-
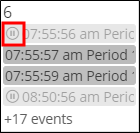
Paused events in the Schedule window are dimmed and prepended with a pause icon.

-
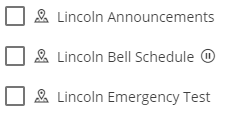
Paused calendars in drop-down lists show a pause icon

Copy an existing calendar to either a new calendar or into an existing calendar.
- Find the Calendar you want to copy.
-
Select
 then
then 
-
Either select the calender you are copying to from the Add to existing calendar list or select the + icon to copy to a new calendar
-
Enable Copy Events to copy all events to the calendar.
-
Enable Copy Pause Ranges to retain any pause ranges in a new calendar or overwrite any pause ranges in an existing calendar.
-
Enable Copy Calendar Settings (only available when copying to a new calendar) to copy a calendar's pause status, time zone, and color.
-
Select Copy to finalize the action.
Use the following icons to manage your calendars.
| Icon | Action |
|---|---|

|
Creating a calendar |
|
|
Importing events from an ICS file |

|
Pausing all events in a calendar This option is unavailable if you do not have edit permissions. |

|
Sort the calendars by Name or Site |

|
Filter the calendars |

|
Edit the selected calendar |
  |
|
  |
Delete the selected calendar Important: There is no recovery process when you delete a calendar. Before deleting a calendar, think about "Pausing all events in a calendar" or just deleting individual events. |
|
|
View a calendar. You will see this icon when you do not have edit permissions. |
