Bell Schedule Tutorial
Revolution has many features to help you set up bell schedules for your school or business.
- Day Templates allow you to quickly define all the relevant times for your schedule.
- The Revolution Scheduling Wizard allows you to rapidly set up repeating schedules for an entire semester, quarter or school year.
- Pause ranges allow you to pause all events for a given date range, which is useful for Winter or Spring breaks.
- Day-based scheduling tasks, including the ability to copy, paste, delete and add templates, allows you to easily set up deviations in your schedules (such as assemblies and early release days).
For this example, we will make the following assumptions:
- You have created a site named Cleveland for Cleveland High School.
- You have created a calendar named Cleveland High School.
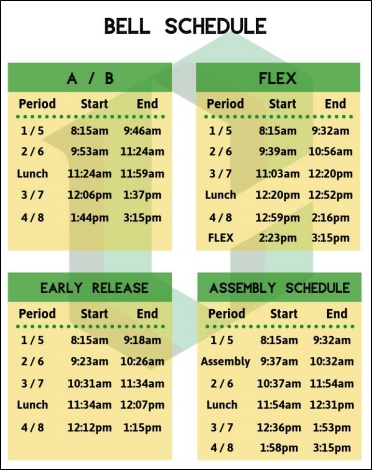
We will base our schedule on a bell schedule with four types of day schedules. The standard day schedule is the A/B day. There are three other day types: Flex days (which have time for meeting with teachers), Early Release (when school is out early), and Assembly days. These three alternate schedules occur at various times throughout the year.
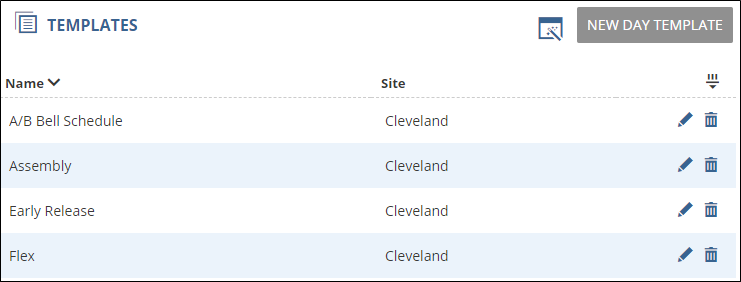
Create templates based on the four schedule types. You can then access these templates when creating repeating schedules or when you need to change the schedule for a given day.
- Go to Scheduler > Templates.
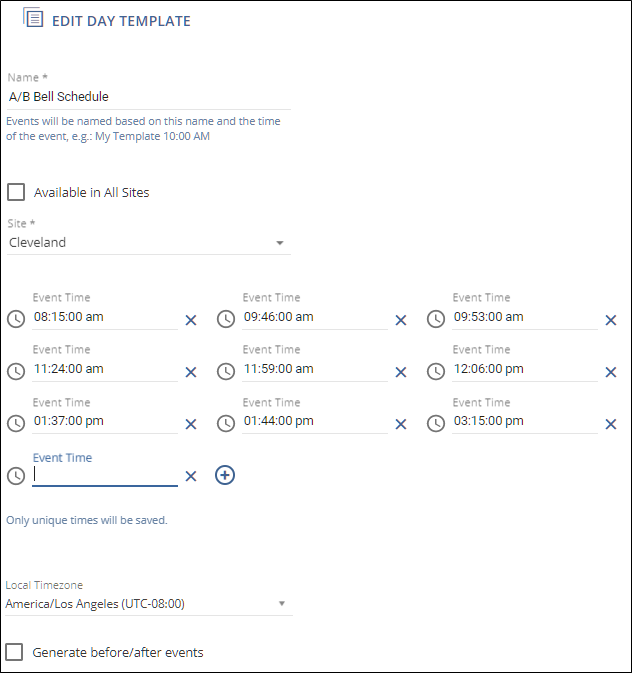
- Select New Day Template.
- Enter a Name, such as A/B Bell Schedule.
Clear Available in All Sites and for Site, select Cleveland.
This template is specific to the Cleveland High School site.
- Enter Event Times for the Start and End times of the periods.
Enter 8:15 in the Event Time field.
Because the field accepts 24-hour time the value is read as 8:15:00 am.
- Click the Plus icon to create a new Event Time field.
Repeat this process for all the other times.
For the afternoon times, you can either enter the 24-hour time (13:37) or append the time with "pm" (1:37 pm).
- Select your Local Timezone.
- Do not select Generate before/after events for this example.
- Repeat this process for the other three schedules.
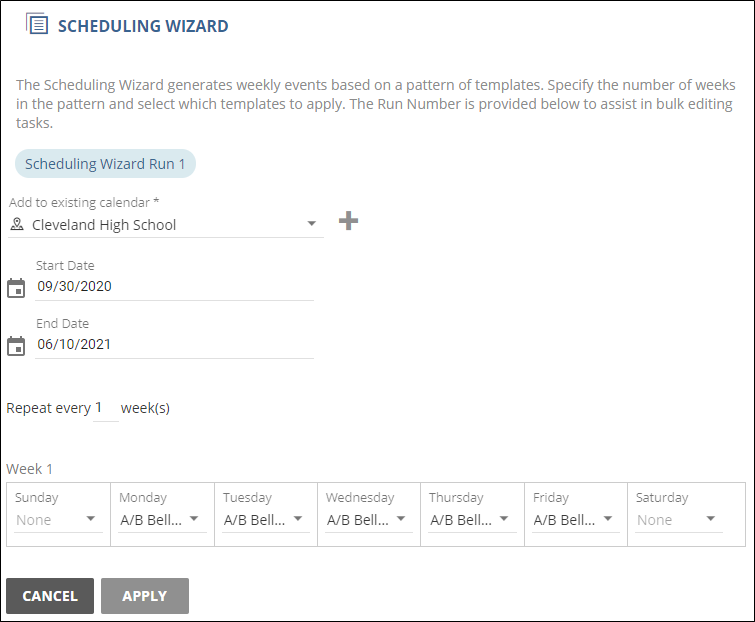
The Scheduling Wizard provides you with an easy way to create weekly repeating schedules based on the day templates you created.
- Go to Scheduler > Templates.
- Select the Scheduling Wizard icon
 .
.For Calendar, select Cleveland High School.
Enter the Start and End Dates for your schedule.
For this example, we are defining the full school year from September 30th to June 10th.
Leave the Repeat setting at 1.
This is because this example does not have alternating weekly schedules.
- For Monday through Friday, select the A/B Bell Schedule template.
- Select Apply.
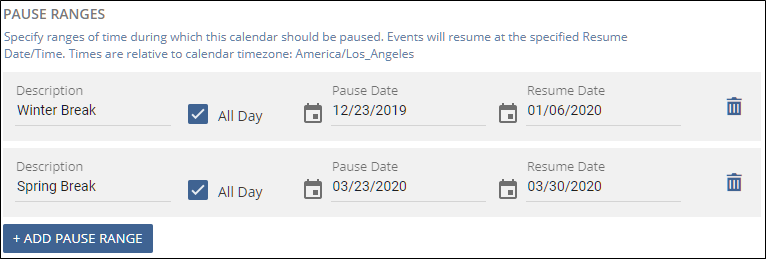
Pause all events for the Winter and Spring breaks by setting Pause Ranges for your calendar.
- Go to Scheduler > Calendars.
- Select the Cleveland High School calendar to edit the details.
- Select Add Pause Range to define the Winter break.
- For Description, enter Winter Break.
- Leave All Day selected.
- For the Pause and Resume Dates, enter 12/23/2019 and 01/06/2020, respectively.
-
Repeat the previous step for Spring Break, between 03/23/2020 and 03/30/2020.
Note: The End Dates are exclusive when you select All Day, so you should always select the day you want the bells to resume.
- Select Save.
When you know that a given day will require an alternate day template, such as an early dismissal or an assembly day, you can follow this process to update your calendar. For this example, we are going to replace one of our A/B days with an assembly schedule.
- Go to Scheduler > Schedule.
- Select the Cleveland High School calendar.
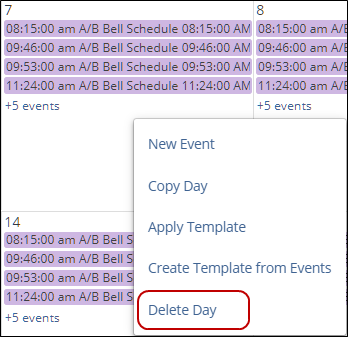
-
Right-click on the day you want to change and select Delete Day and confirm the deletion in the Delete Events dialog box.
This will clear the A/B schedule from the day.
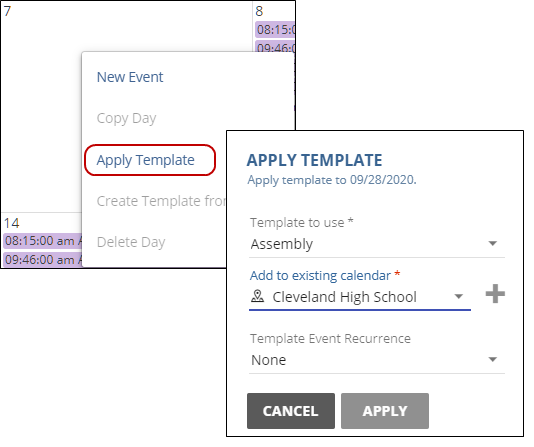
- Right-click, again, on the day you want to change and select Apply Template.
- For Template to use, select the name of the assembly schedule template you created.
- The Cleveland High School calendar should already be selected.
- Click Apply.
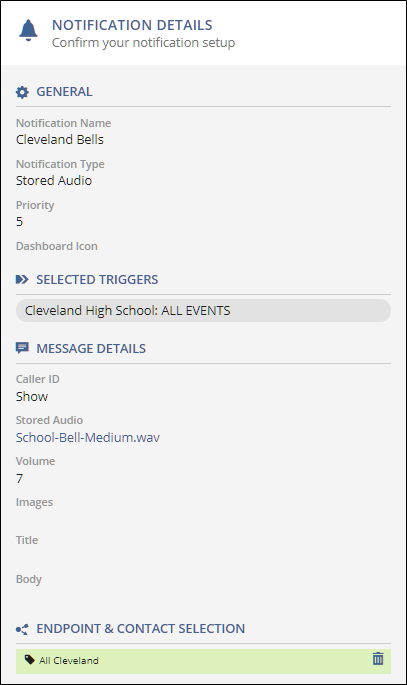
Set up notifications for all events in the Cleveland High School calendar
- Go to Notifications > Manage.
- Select New Notification.
- General tab: Enter a Notification Name and for Notification Type, select Stored Audio.
- Select Triggers: For Activator, select Scheduler; for Calendar, select Cleveland High School; and for Trigger, select ALL EVENTS.
- Message Details: For Select Audio, select the audio file to use as your notification.
- Endpoint & Contact Selection: Select your endpoints using any method you have set up, either individual endpoints, User Tags or System Tags.
- Review your settings in Notification Details and click Save.